
How to Use Azure App Service Deployment Slots for Zero-Downtime Releases
Step-by-step guide to setting up deployment slots in Azure App Service. Deploy to staging, validate, and swap to production with zero downtime.
- Set up a staging deployment slot alongside your production App Service
- Deploy and validate changes in staging before touching production
- Swap slots for a near-instant, zero-downtime release
- Learn which settings stick to a slot and which travel with the code — this is where most people get tripped up
Why Deployment Slots Matter
You've got a web app running in Azure App Service. It's live, users are hitting it, and now you need to push an update. The old-school approach? Deploy straight to production and hope nothing breaks. We've all done it. It's fine until it isn't.
Deployment slots give you a better option. You get a separate live instance of your app — same App Service, same plan — where you can deploy your update, test it, and then swap it into production. The swap happens at the load balancer level, so it's near-instant. No downtime, no cold starts hitting your users, and if something goes wrong you can swap right back.
You need a Standard, Premium, or Isolated App Service plan. Slots aren't available on Free, Shared, or Basic tiers.
Deploy the App to Production
First, let's get a sample app running. I'm going to clone a demo app, package it, and deploy it using the Azure CLI. If you already have an App Service with code running, skip ahead to the next section.
# Clone the sample app and deploy as a zip package
git clone https://github.com/cloudlearn-io/deployment-slots-lab-app.git
cd deployment-slots-lab-app
zip -r webapp.zip .

az webapp deploy --type zip \
  --resource-group rg-demo \
  --name webapp-slots-demo \
  --src-path webapp.zip
The az webapp deploy --type zip command uploads and extracts everything in one shot. Once it finishes, your app is live at webapp-slots-demo.azurewebsites.net.
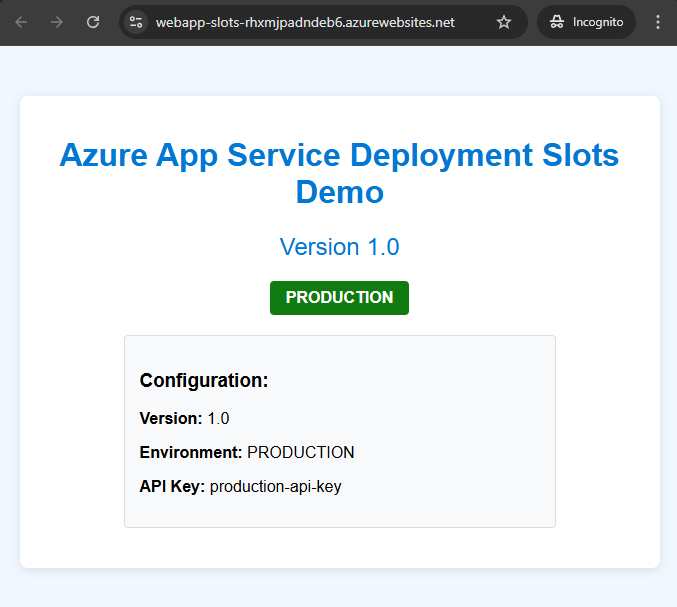
The app displays its current version, environment label, and configuration. Pay attention to these values — they'll change when we swap, and understanding which ones change is the whole point.
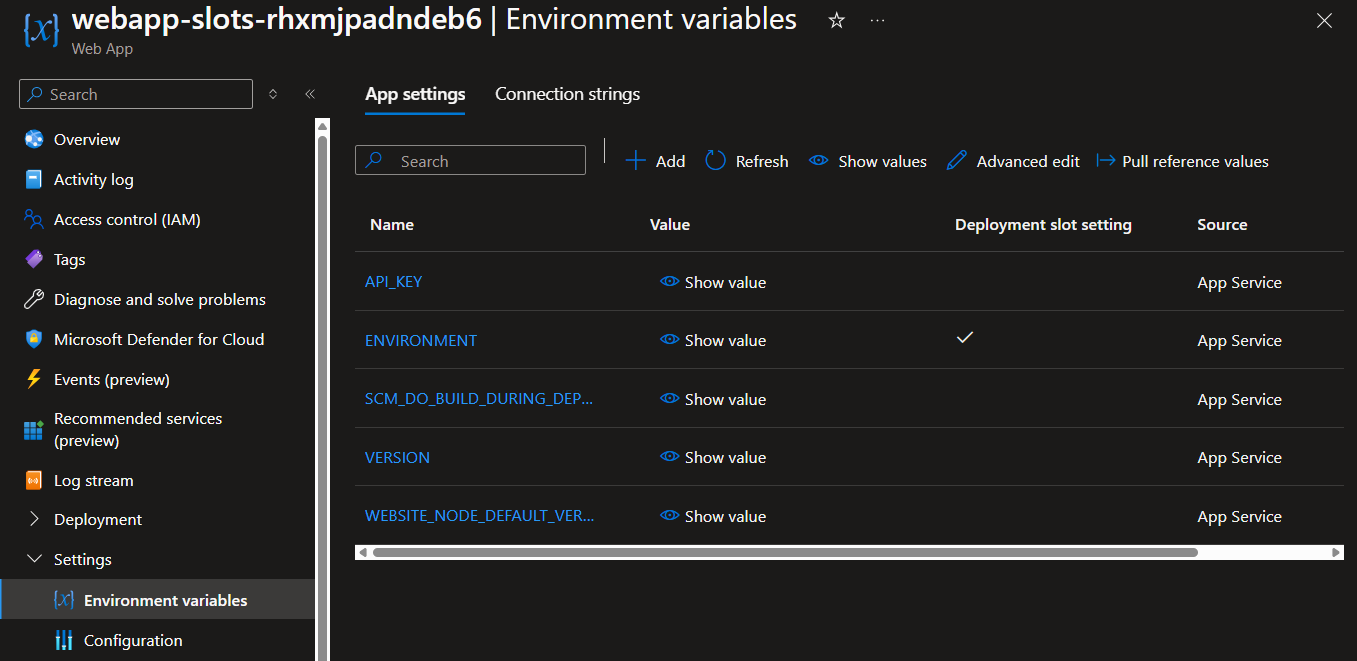
If you check Environment variables in the portal, you'll see the app settings that control this behavior:
Create a Staging Slot
Now for the interesting part. You can create a slot from the portal or the CLI — I'll show the CLI since it's faster and scriptable:
az webapp deployment slot create \
  --name webapp-slots-demo \
  --resource-group rg-demo \
  --slot staging \
  --configuration-source webapp-slots-demo
The --configuration-source flag clones your production settings into the new slot. This is important — you want staging to mirror production as closely as possible.

Your staging slot gets its own URL: webapp-slots-demo-staging.azurewebsites.net. It's a fully independent instance running on the same App Service plan.
Configure Slot-Specific Settings
Here's where it gets interesting. Some settings should travel with your code when you swap (like a feature flag or app version). Other settings should stay with the slot (like a database connection string or an environment label). Azure calls these slot settings or sticky settings.
Update the staging slot's environment variables to differentiate it from production:
# Mark ENVIRONMENT as a slot setting (sticky — stays with the slot)
az webapp config appsettings set \
  --name webapp-slots-demo \
  --resource-group rg-demo \
  --slot staging \
  --slot-settings ENVIRONMENT=staging

# Regular settings (will swap with the code)
az webapp config appsettings set \
  --name webapp-slots-demo \
  --resource-group rg-demo \
  --slot staging \
  --settings VERSION=2.0 API_KEY=new-api-key
Notice the difference: --slot-settings makes a setting sticky, --settings makes it swappable. Use --slot-settings for anything environment-specific — database connections, environment labels, API endpoints that differ between staging and production.

Deploy to Staging and Validate
Update your code (bump a version, change a heading, whatever your update is) and deploy to the staging slot. The only difference from a normal deploy is the --slot flag:
# Make your code changes, then package and deploy to staging
zip -r webapp.zip .

az webapp deploy --type zip \
  --resource-group rg-demo \
  --name webapp-slots-demo \
  --src-path webapp.zip \
  --slot staging
Now visit your staging URL and verify everything looks right:

The staging slot shows version 2.0, the environment label says "STAGING", and your code changes are live — all without touching production. Your users are still hitting the original v1.0 on the production URL.
This is where you run your smoke tests, have QA take a look, or just click around and make sure nothing is broken.
Swap to Production
Once you're confident, swap staging into production:
az webapp deployment slot swap \
  --resource-group rg-demo \
  --name webapp-slots-demo \
  --slot staging \
  --target-slot production
Before the swap executes, Azure warms up the staging slot by sending HTTP requests to the app root. This means your users don't hit a cold instance — the app is already running and ready when traffic shifts over.
The swap preview in the portal shows you exactly what will happen — which settings travel and which stay:
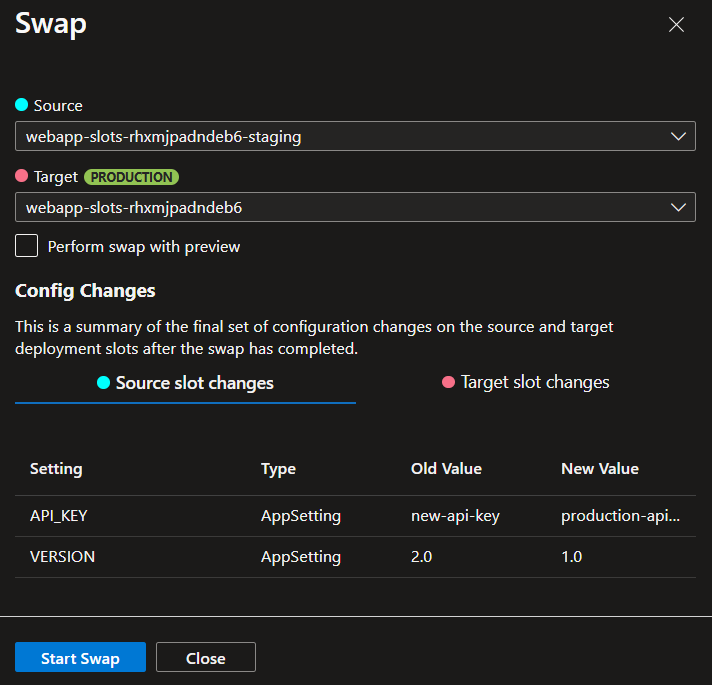
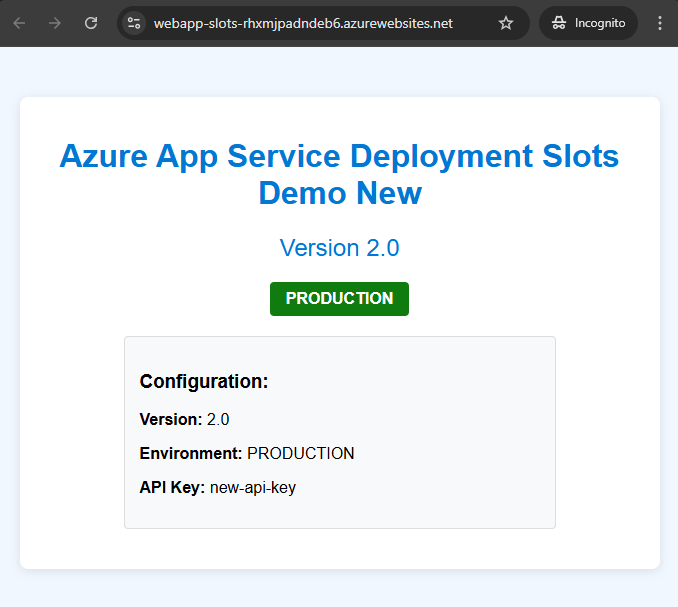
After the swap completes, production now has your v2.0 code. The ENVIRONMENT label still reads "PRODUCTION" because it's a slot setting — it stayed with the slot. The VERSION and API_KEY moved with the code.
And here's the safety net: your staging slot now contains the old production code. If something goes wrong, you swap again and you're back to where you started.
What Will Bite You
Slot Settings vs Regular Settings
This is the number one thing that catches people. If you forget to mark your database connection string as a slot setting, your staging slot will connect to the production database after a swap. Or worse — production starts talking to your staging database. I've seen this break in client environments where they assumed connection strings were sticky by default. They're not.
Always mark database connection strings, environment labels, and external API endpoints as slot settings. If staging talks to production data after a swap, you've got a data integrity problem that's hard to undo.
Quick rule: if the value should be different between staging and production, it needs to be a slot setting.
The Warm-Up Trap
Azure warms up your app before completing the swap by hitting the root URL (/). But if your app has initialization that happens on other routes — database migrations, cache warming, background job setup — those won't be triggered. Your first real users might still hit a slow request.
Add custom warm-up paths in your App Service configuration. You can define initialization routes that Azure will hit during the warm-up phase before routing production traffic.
Auto-Swap Is Not Available Everywhere
Auto-swap automatically pushes code from staging to production after warm-up completes — great for CI/CD pipelines. But it's not supported on Linux App Services or Web App for Containers. If your pipeline depends on it and you're running Linux, you'll need to trigger the swap explicitly from your deployment script.
Rollback Isn't Instant If You've Run Migrations
Swapping code back is instant. But if your v2.0 code ran a database migration during staging validation, swapping back to v1.0 won't undo that migration. Your old code might not be compatible with the new schema. Always plan your database changes to be backward-compatible across at least one version.
What's Next
Deployment slots handle the release side. For the full pipeline — code push to automated deploy — pair this with GitHub Actions:
Building Your First CI/CD Pipeline with GitHub Actions and Azure
Set up the pipeline that deploys to your staging slot automatically.
You can also explore traffic routing to gradually shift a percentage of users to the new slot before doing a full swap — useful for canary releases:
# Route 20% of production traffic to staging for canary testing
az webapp traffic-routing set \
  --distribution staging=20 \
  --name webapp-slots-demo \
  --resource-group rg-demo
Once you're comfortable with the pattern, it becomes the default way you ship. Deploy to staging, validate, swap. No more crossing your fingers on production deploys.
Read Next
Azure Static Web Apps Is the Most Underrated Service for Developers
Why Azure Static Web Apps should be your default for frontend deployments — free tier, zero-config CI/CD, built-in auth, and API routes included.
Azure Deployment Stacks Change Everything About Resource Lifecycle
How Deployment Stacks solve the resource orphan problem that Bicep and ARM alone can't — with DenySettings, managed cleanup, and lifecycle awareness.